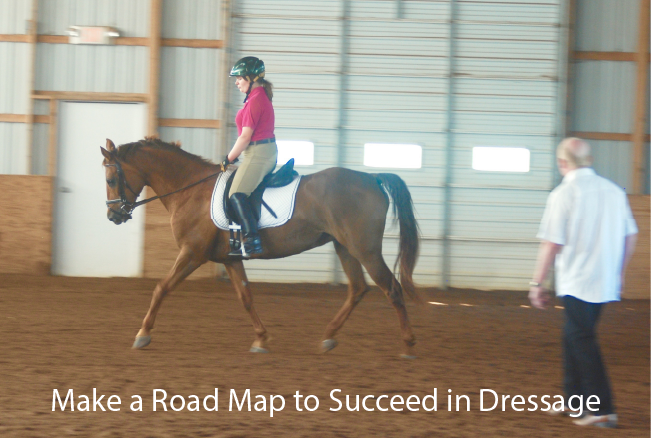
Make a Road Map to Succeed in Dressage
by Nikki Alvin-Smith

To succeed in building your horse’s gymnastic strength and ability to attain high quality dressage movements throughout a test it is important you build both his mental and physical self. The idea is to develop him as a confident individual who is 49% of your partnership. It may not always be easy to channel his exuberance into a good work ethic and focus but with some carefully considered routines and a clear road map you’d be surprised at just how successful you can be making up your ‘finished’ dream dressage horse.
Here are some guidelines based on my experience and tips I suggest to my clinic students.
Every Step Counts
When you are riding your horse at any time his entire focus must be directed at staying active and in front of your leg. Do not allow him to ‘donkey around’ just because you are in warm up, cool down or taking a break between schooling sessions.
The Important Warm Up and Cool Down
Have a plan when you start your warm up and be prepared to modify the routine slightly if needed to address a specific issue. The idea of the warm up is to loosen up the horse’s soft tissue and to lubricate the joints. A sugar cube given before starting out will encourage salivation effectively softening the action of the bit. If your horse has a tendency to be arthritic or has been standing in a stall for a while before you ride, massage in a liniment to the outside of the hock joints and stifle to help warm them up.
During your warm up begin with an active walk. Make a transition to the trot and then after a circuit begin building transitions from trot to three steps of walk back to trot to encourage the horse to engage his hind end. Use circles for control. If your horse is not correctly accepting the bit then take him in counter flexion on the circle or arena for a few strides and reverse your leg aids to match. This will prevent him from blowing off your outside leg. Once he gives in his poll then set him to true flexion (the inside) once again and continue. If he is not making transitions on the bit then position him in shoulder in both in and out of the transition. This is something you would routinely do in advanced dressage.
You are looking for a clear rhythm as this will provide relaxation. As soon as your horse is moving forward in good rhythm (on his hind end and basculing to the bridle with suppleness not down on his forehand), you can ask for a little more elevation in within the gait for a few strides at a time. Use your leg aids, half halt the energy you have created by soft frequent half halts on the outside rein, and post slightly higher and a tiny bit faster. When you want your horse to come back to you then post slower and lower and bring him back to ‘his happy place.’ If your horse simply rushes then you have asked for too much gait. Simply hit the reset button and bring him back to the sweet spot and then ask him again but with quieter aids and with less driving aid. This addition of ‘ rev’ or power is the method to develop cadence. As your horse becomes stronger he will be able to show more and more extravagant gaits.
For advanced horses you can add shoulder in, then haunches in, then a few strides of half pass at the trot. It is wise to complete these movements at the sitting trot with frequent intermissions with posting trot to soften the horse’s back and maintain forward thought.
Once you have established that your horse is listening to both legs you can move on to work at the canter. Follow the same principles as above. Keep your horse in a shoulder fore position in the canter and be certain he is moving in a straight line and not curving his haunches to the inside and throwing his shoulder to the outside.
Make frequent transitions and play with the energy in the gait and develop the horse’s cadence. Transitions may be canter, three strides of trot, back to canter. For a more advanced horse you may go from canter to walk three strides and back to canter and add the lateral movements once the horse is warmed up.
In ‘cool down’ you will do these same activities in reverse. You will end up in an active walk and then hop off and lead your horse to cool him out and distribute the lactic acid build up that has occurred during the work session. I will generally loosen the girth, run up the stirrups, loosen the noseband and take the reins over the head. Keep the walk active, as this will have the most benefit for the horse. Do not allow the horse to rub on you at all. Firstly this is a sign of dominance and secondly when there are two bits in his mouth in a double bridle a good head rub can not only destroy your lovely riding gear it can also hurt.
The Lesson Road Map
So your beautiful horse is now thoroughly warmed up. What is your plan? I am frankly amazed at the number of times I have a student arrive at a clinic and they have not practiced almost at all since I saw them a month before. However, they do expect to move up a level this season.
The first rule of thumb for showing is to work your horse successfully at home at a level above the level you plan to show. This accounts for the show distractions and tenseness and loss of focus the show environment might evoke in your horse at competition.
The second rule of thumb is to learn your test inside and out. Again, many riders seem to think they will just plug it in a few days before or even on the day. Try doing that at Grand Prix! A good work ethic from you, the ‘Director’ of the whole event will make you more confident when you enter at A plus make life a whole lot easier for your horse. While you don’t want to over rehearse the entire test so that your horse preempts your aids, you should be able to segment it into three or four parts and easily put them together without worrying. Please ride your corners and learn how to do a correct halt. As a halt always comes up twice in a test this is 20 points you can garner right off the bat.
The third rule of thumb is to follow the directions of your regular trainer between lessons and practice efficiently the movements you will encounter in the test. A good trainer will give you a few key points to improve your riding in each session and does expect that you will go home and practice those facets before they see you again so they are able to build you and your horse up both mentally and physically for the next task.
As a clinician I am only seeing a rider for an hour or two every month or two, sometimes only twice a year. I will always focus on the two or three major issues the horse and rider are experiencing and try and correct basic faults and teach them to feel the difference. Additionally, I will see other areas that need work and I may indicate these areas to the student as a guideline or route map so they can define their long term goals. Hopefully their trainer is on hand watching the session and will garner these insights too that they can use them to advance the student. I am truly impressed with returning students that have clearly done their homework.

Do not show all the time. Mark out a reasonable schedule that does not add too much pressure for you and your horse. Shows are expensive and stressful for the horse. Choose your clinic schedule wisely too. Working regularly with a great clinician will help you define the road map you need to follow.
Be Flexible
Horses and riders all have good days and bad and the program you set for yourself before you mounted may need to be changed up if the horse indicates he is not comfortable with a movement or is simply not listening. As a rider try not to bring daily life drama to your horse and set yourself up for success by having a positive attitude and real focus on the task at hand.
For example, if your horse won’t take up the canter lead without running through the bridle then forget about canter for now and work the horse in lots of transitions between trot and walk, add some shoulder in/fore work, and make sure the horse is truly in front of your leg and listening. Then try the canter again as you head into the short side of the arena. If he won’t take the correct lead then take his head to the outside and release the inside rein and allow room for his shoulder to come up on the correct lead side. Perhaps your horse is stiff to one side for some unknown reason. Simply work him on his good side and do smaller sessions on his stiff side and use different exercises to loosen him up. For example for an advanced horse, half a long side of shoulder in, one straight stride, then the rest of the long side in haunches in. This will loosen up the sacroiliac and hock joints in the horse.
For a less advanced horse try serpentines and add small circles at A and C afterward in each direction. At the walk take your horse in shoulder fore position and then counter flex him to the outside (reversing the leg and rein aids) to be certain your horse is listening to both legs. Once your horse is working happily on his stiff side you can go back to even work on both reins.
Always allow enough time to ride. Do not rush in and rush out of your riding time with your horse. Sometimes the schooling session may go longer, not end up being anything to do with the lesson you had planned at all. It doesn’t matter. As long as it is a positive result and you overcame something or had one ‘ah ha’ moment (or your horse did), then you are on the right track. Do not over ask either yourself or your horse. If things repeatedly get off track then consult a trainer for help.
Don’t Have a Trainer?
All riders need some help from a ground person and hopefully that person is as educated as possible. They need to know not just movements and tricks, but need to be good at actually teaching. A good trainer never yells. A good trainer is always encouraging of every effort from the horse and/or rider no matter how tiny. A good trainer will have a road map for you and knows exactly where they are taking you on the dressage route and why. Some very advanced clinicians will not take on basic students. In my experience the earlier I can start to work with a rider, the quicker and easier their progression will be as I have a clear understanding of where we are headed and how to reach our destination successfully. A good trainer will have made horses well above the level they are training you and your horse and will treat you both as individuals and address you own quirks and issues not issue a cookie cutter commentary. I love when students finish up a lesson and come and ask me questions afterward. Never be shy to ask a trainer/clinician for a short, medium and long term goal plan for your riding.
If you truly cannot find/afford a good trainer to work with on a regular basis (regularity is important as it is so easy to get into bad habits alone), then using videos is the best way to self evaluate. Mirrors are fine when you know what you are doing but they can also be distracting.
Education is Key
Educate yourself by watching only good riding on DVDs, download and read books.
When you arrive in front of a trainer/clinician you want to enjoy the best ‘bang for your buck ‘ so know the aids and intent/benefit of the dressage movements you’ll be schooling so that when the trainer suggests one you know what to do in principle. Even if the first few attempts are a blow out, the trainer will be able to explain and help you correct the issues if you already have an understanding of what you are supposed to be doing, when and why.
In conclusion remember to be patient. It is important to be kind, consistent and patient with your horse and indeed with yourself. Time is your friend, not your enemy.
Happy Riding!
About the author: Nikki Alvin-Smith is an international Grand Prix dressage trainer/clinician who has competed in Europe at the Grand Prix level earning scores of over 72%. Together with her husband Paul, who is also a Grand Prix rider, they operate a private horse breeding/training farm in Stamford, NY.


